Hello friends! It’s almost American Thanksgiving! And I realize, looking through my blog, that I’ve only given you three Thanksgiving recipes: fresh cranberry orange relish, apple carrot beetroot salad, and vegan pecan pie. After 10+ years of blogging, you’d think there would be more! I’ve done you a disservice, and I apologize.
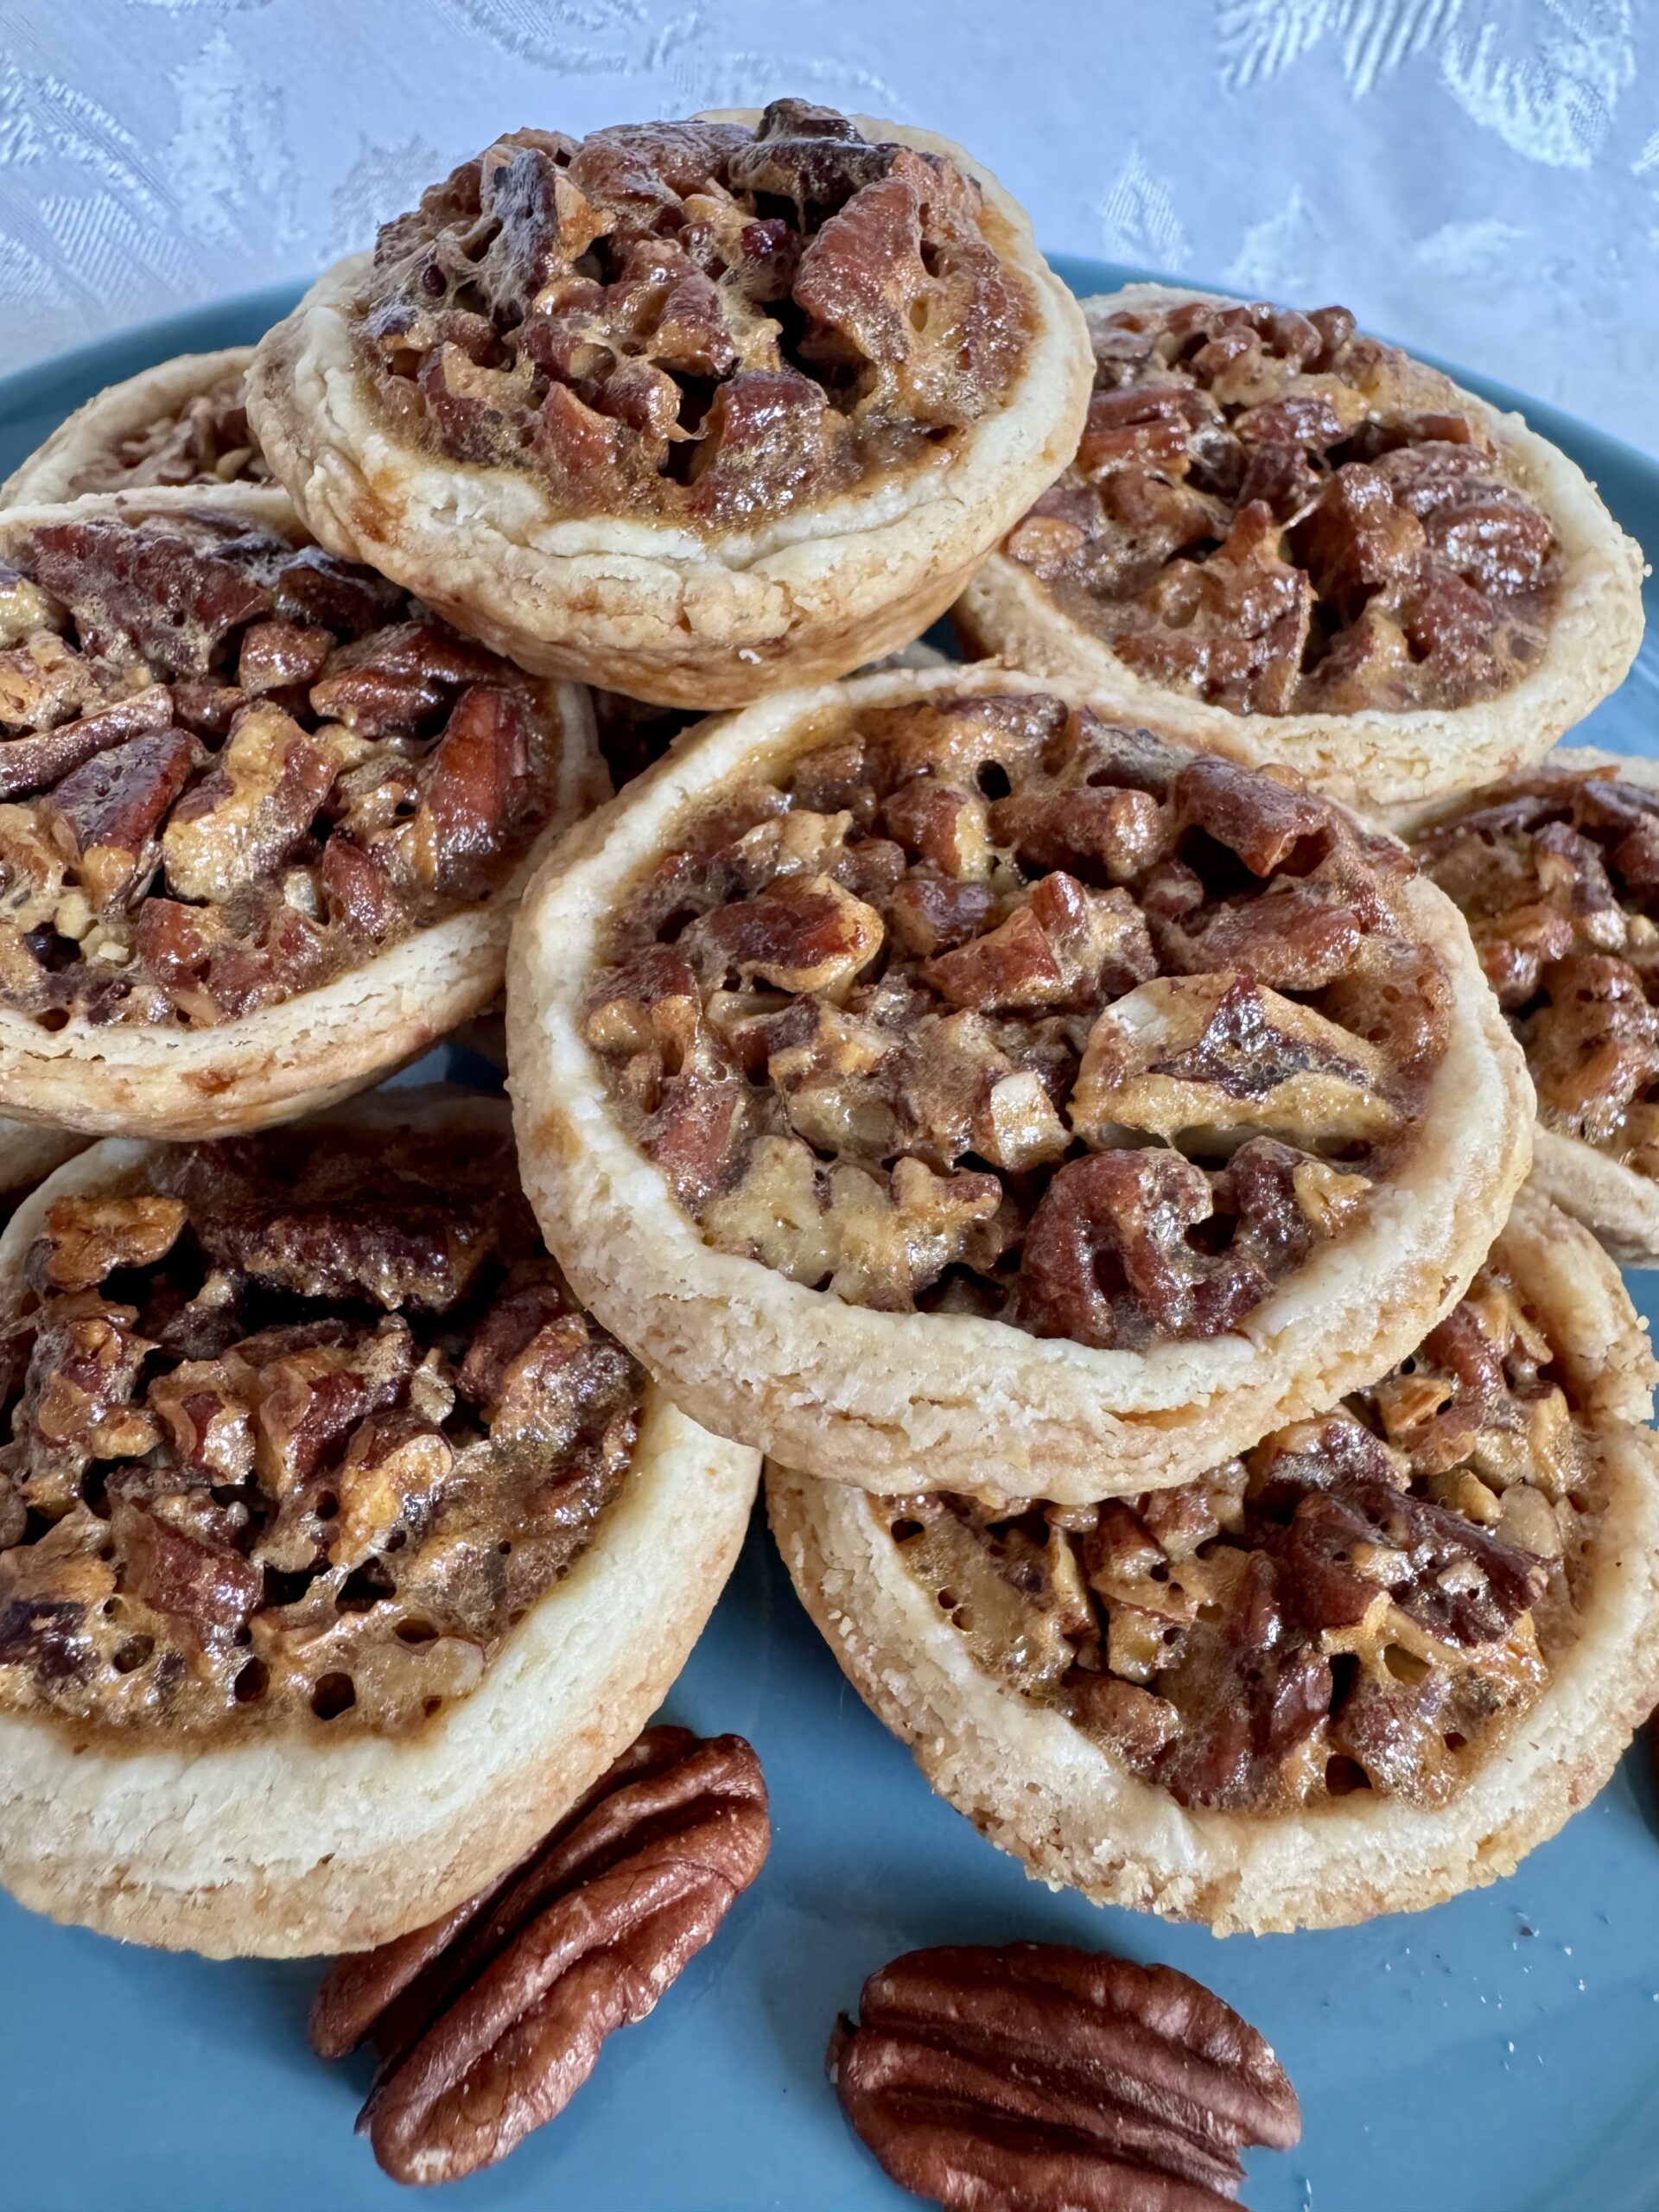
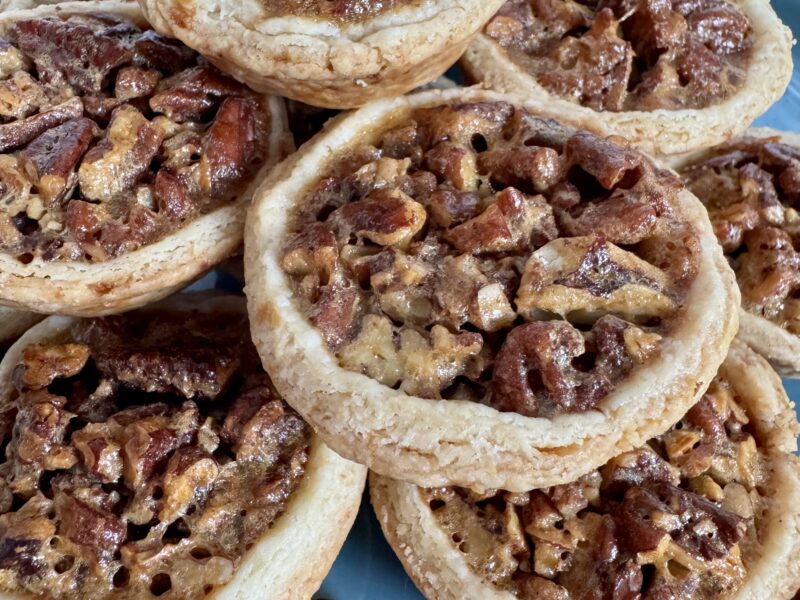
To begin rectifying this situation, I bring you: Mini Pecan Pie Tartlets. These cute little tartlets are a bite-sized (okay, two bites!) version of traditional pecan pie. Rich, gooey, and packed with toasty pecans, they are a perfect size to pop in your mouth when you think you’re just too full to eat another bite. Trust me, you’re not.
I’ve never made tartlets at Thanksgiving before; we always just go for the whole pies. And we make a lot of them, no matter how many or how few are coming to dinner. This year we’ll be six, and I’m planning on serving cherry pie, pumpkin pie, and these pecan pie tartlets. I love the idea of these little mini-pies… you can get a little taste without having to commit to a whole piece of pie. And their size and shape means you get proportionally more crust with every bite because the whole thing is surrounded by crust. Can never go wrong with that!
Unlike my vegan pecan pie, this recipe calls for traditional ingredients… eggs, butter, corn syrup, brown sugar, and of course, plenty of pecans. My recipe does use a bit less butter and sugar than many traditional recipes, but it’s still a pretty hefty amount. Isn’t that “unhealthy” though? Especially for a health and fitness blog! Well, here’s how I look at it: we don’t eat pecan pie very often, and when we do, it’s at a big family dinner where we’re sharing with a lot of people. Of course it wouldn’t be prudent to eat nothing but pecan pie all day every day. But we don’t! So for these special times with family and friends, let’s just focus on, well, the special time with family and friends. That said, I do still like my vegan pecan pie, and it pleases me that I have a vegan recipe that works well. But I just don’t feel the need to “health-ify” everything I make anymore, especially on Thanksgiving. I think my kids just gave a big sigh of relief to hear me say that out loud.
So let’s make these yummy little pies! They are dead easy to whip up… just stir together the filling ingredients and pour it into the tart shells. I’m going to talk you through making the pastry cases, because I feel like people perceive it as difficult or scary or downright impossible, and no one wants the pressure of making homemade shortcrust pastry at Thanksgiving. But believe me, it’s really not that hard, once you have the right attitude about it. My mother once turned out homemade crust for ten cherry pies (yes, TEN!) for a school bake sale when I was about 9 years old. She did this in about half an hour; I can’t remember why she was rushed, but she was. I watched in awe as her hands flew, cutting shortening and rolling dough, and I asked her how she was doing it so fast. Without looking up from her work, she said, “Dear, pie crust is one of those things that the faster you do it, the better it turns out.” I have remembered her wise words ever since.
When you’re making the dough, start with chilled ingredients- really cold butter, cold shortening, and ice cold water. In the Philippines, I also chill a marble block to roll the dough out on. Keeping everything cold is key to a flaky crust. I use a pastry blender to cut in the butter and shortening, but I’ve also used two knives in scissor-like fashion to cut it in, and it works just as well (just more tiring on the arms.) When the mixture resembles coarse crumbs with a few larger pieces left, I’m ready to add the water, which has been chilling in the freezer. It’s another way to keep me moving quickly, because I don’t want the water to be frozen solid by the time I’m ready for it!
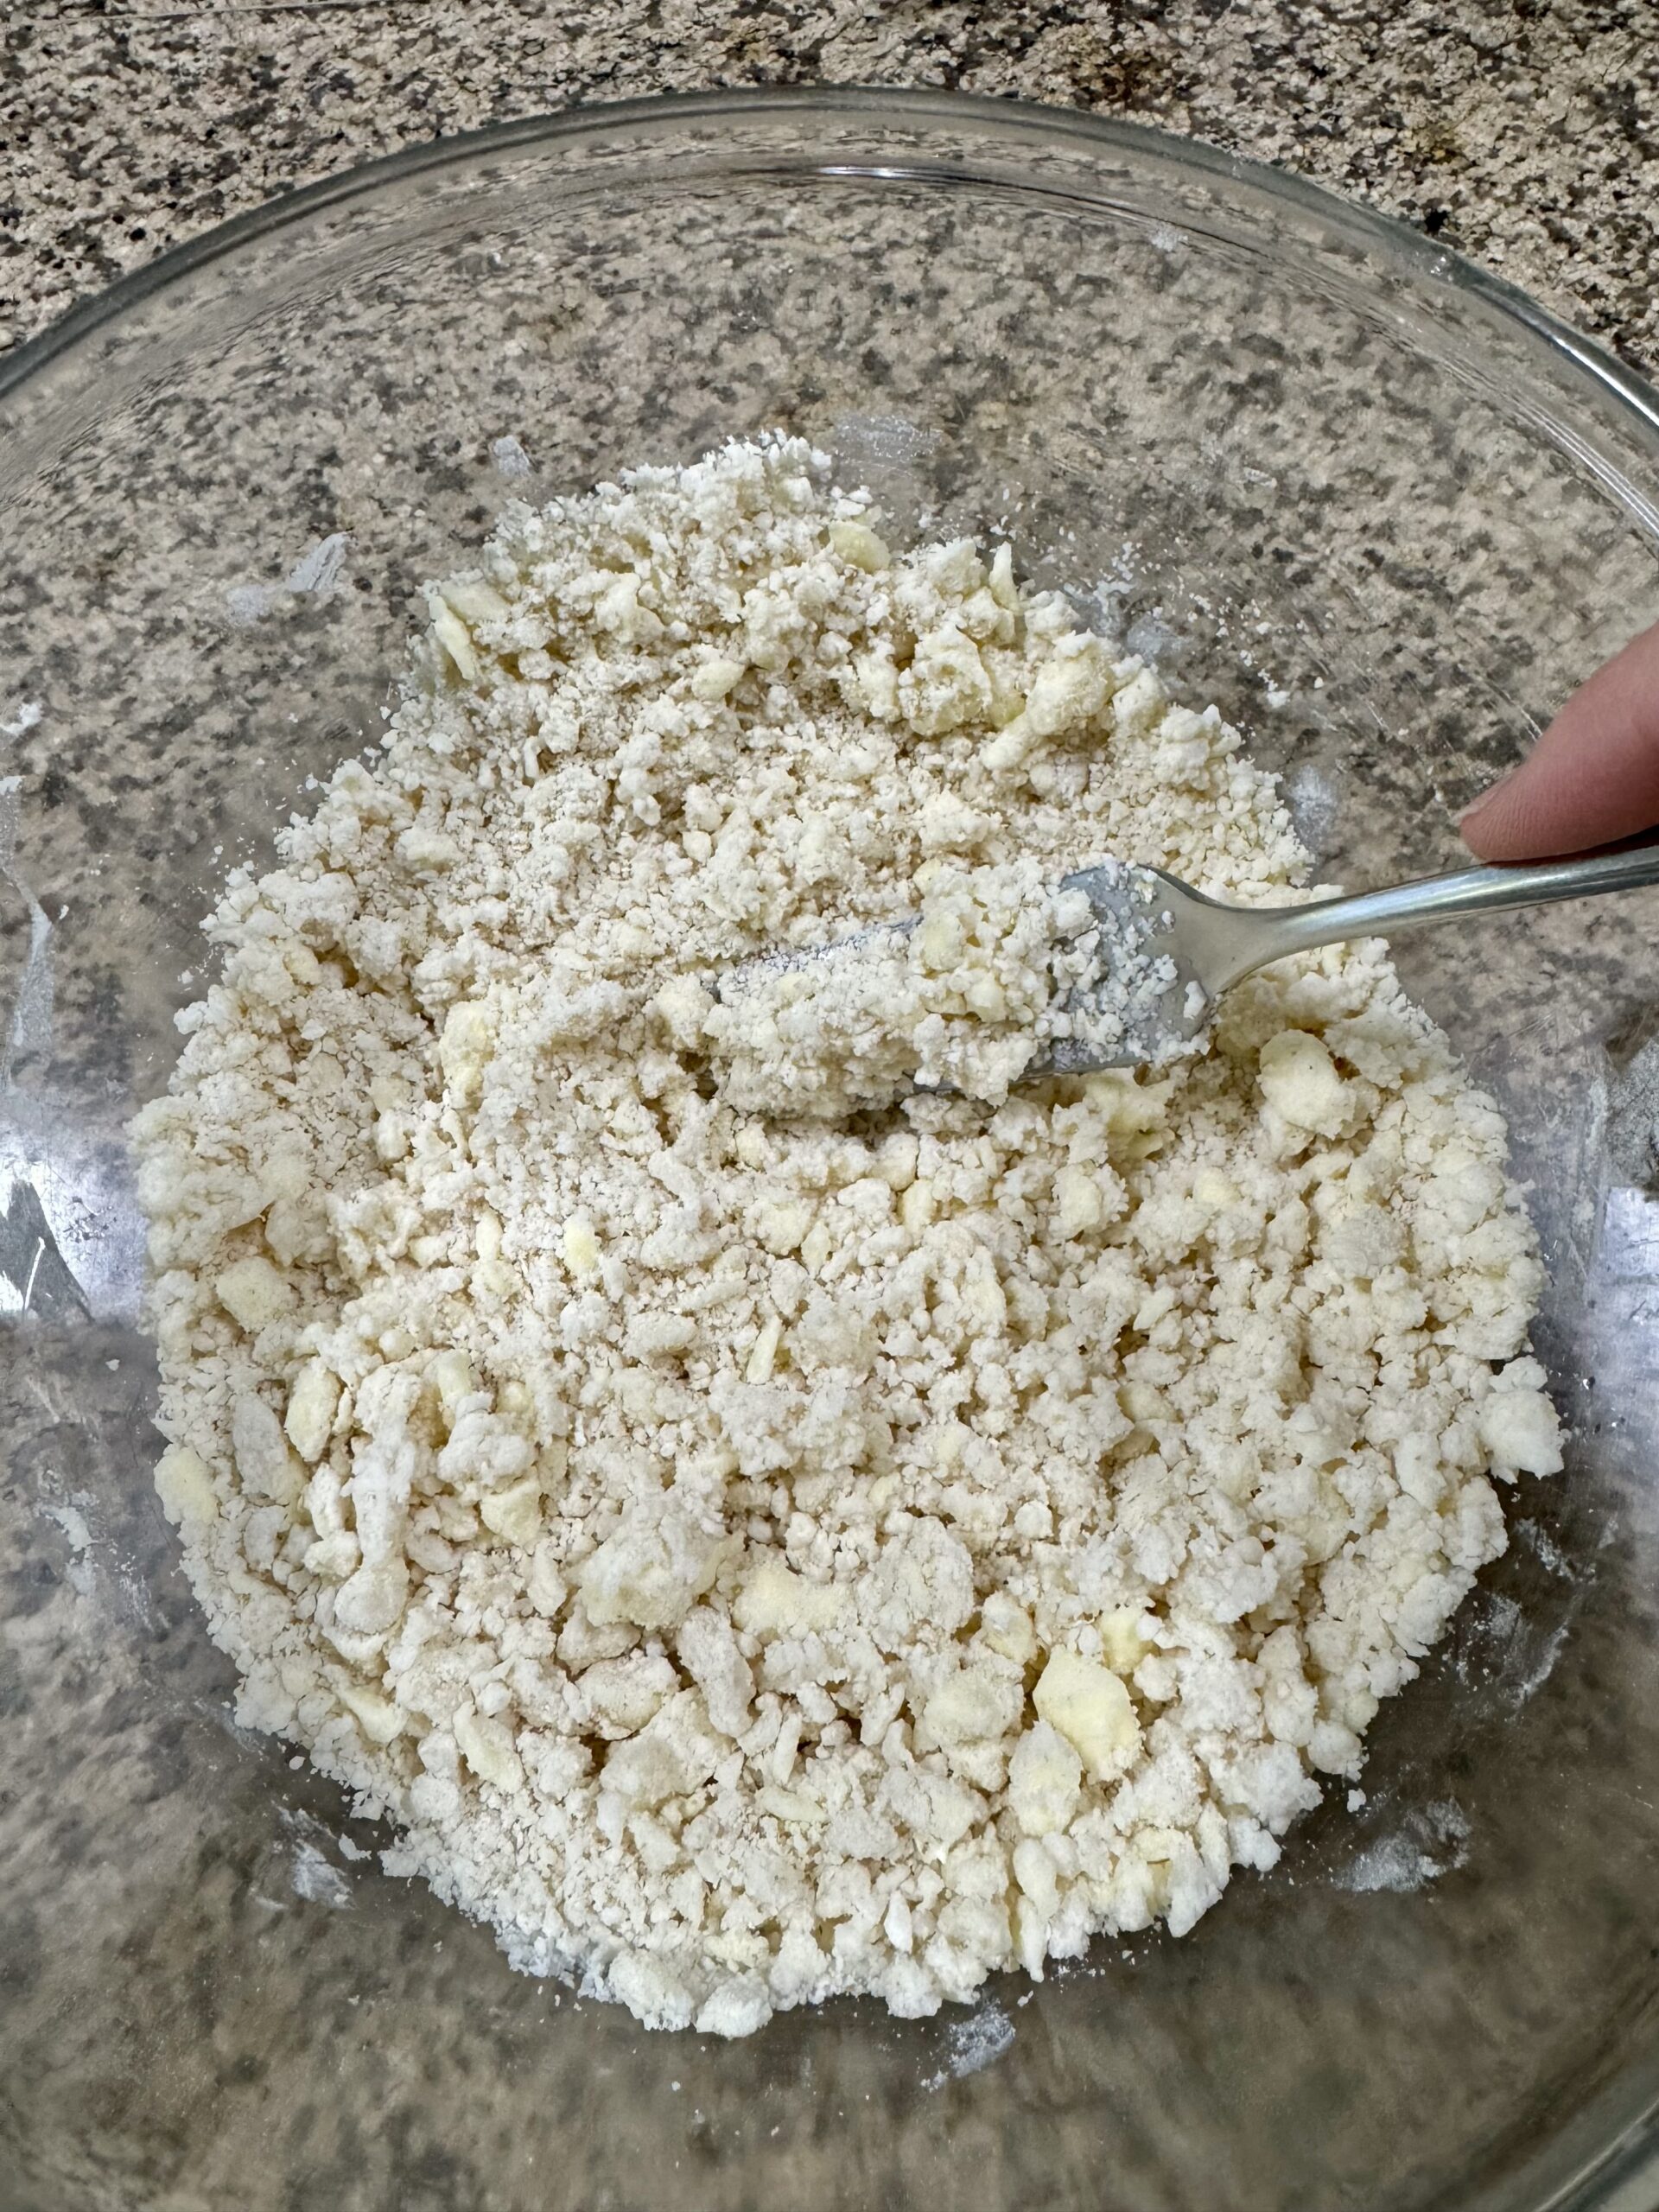
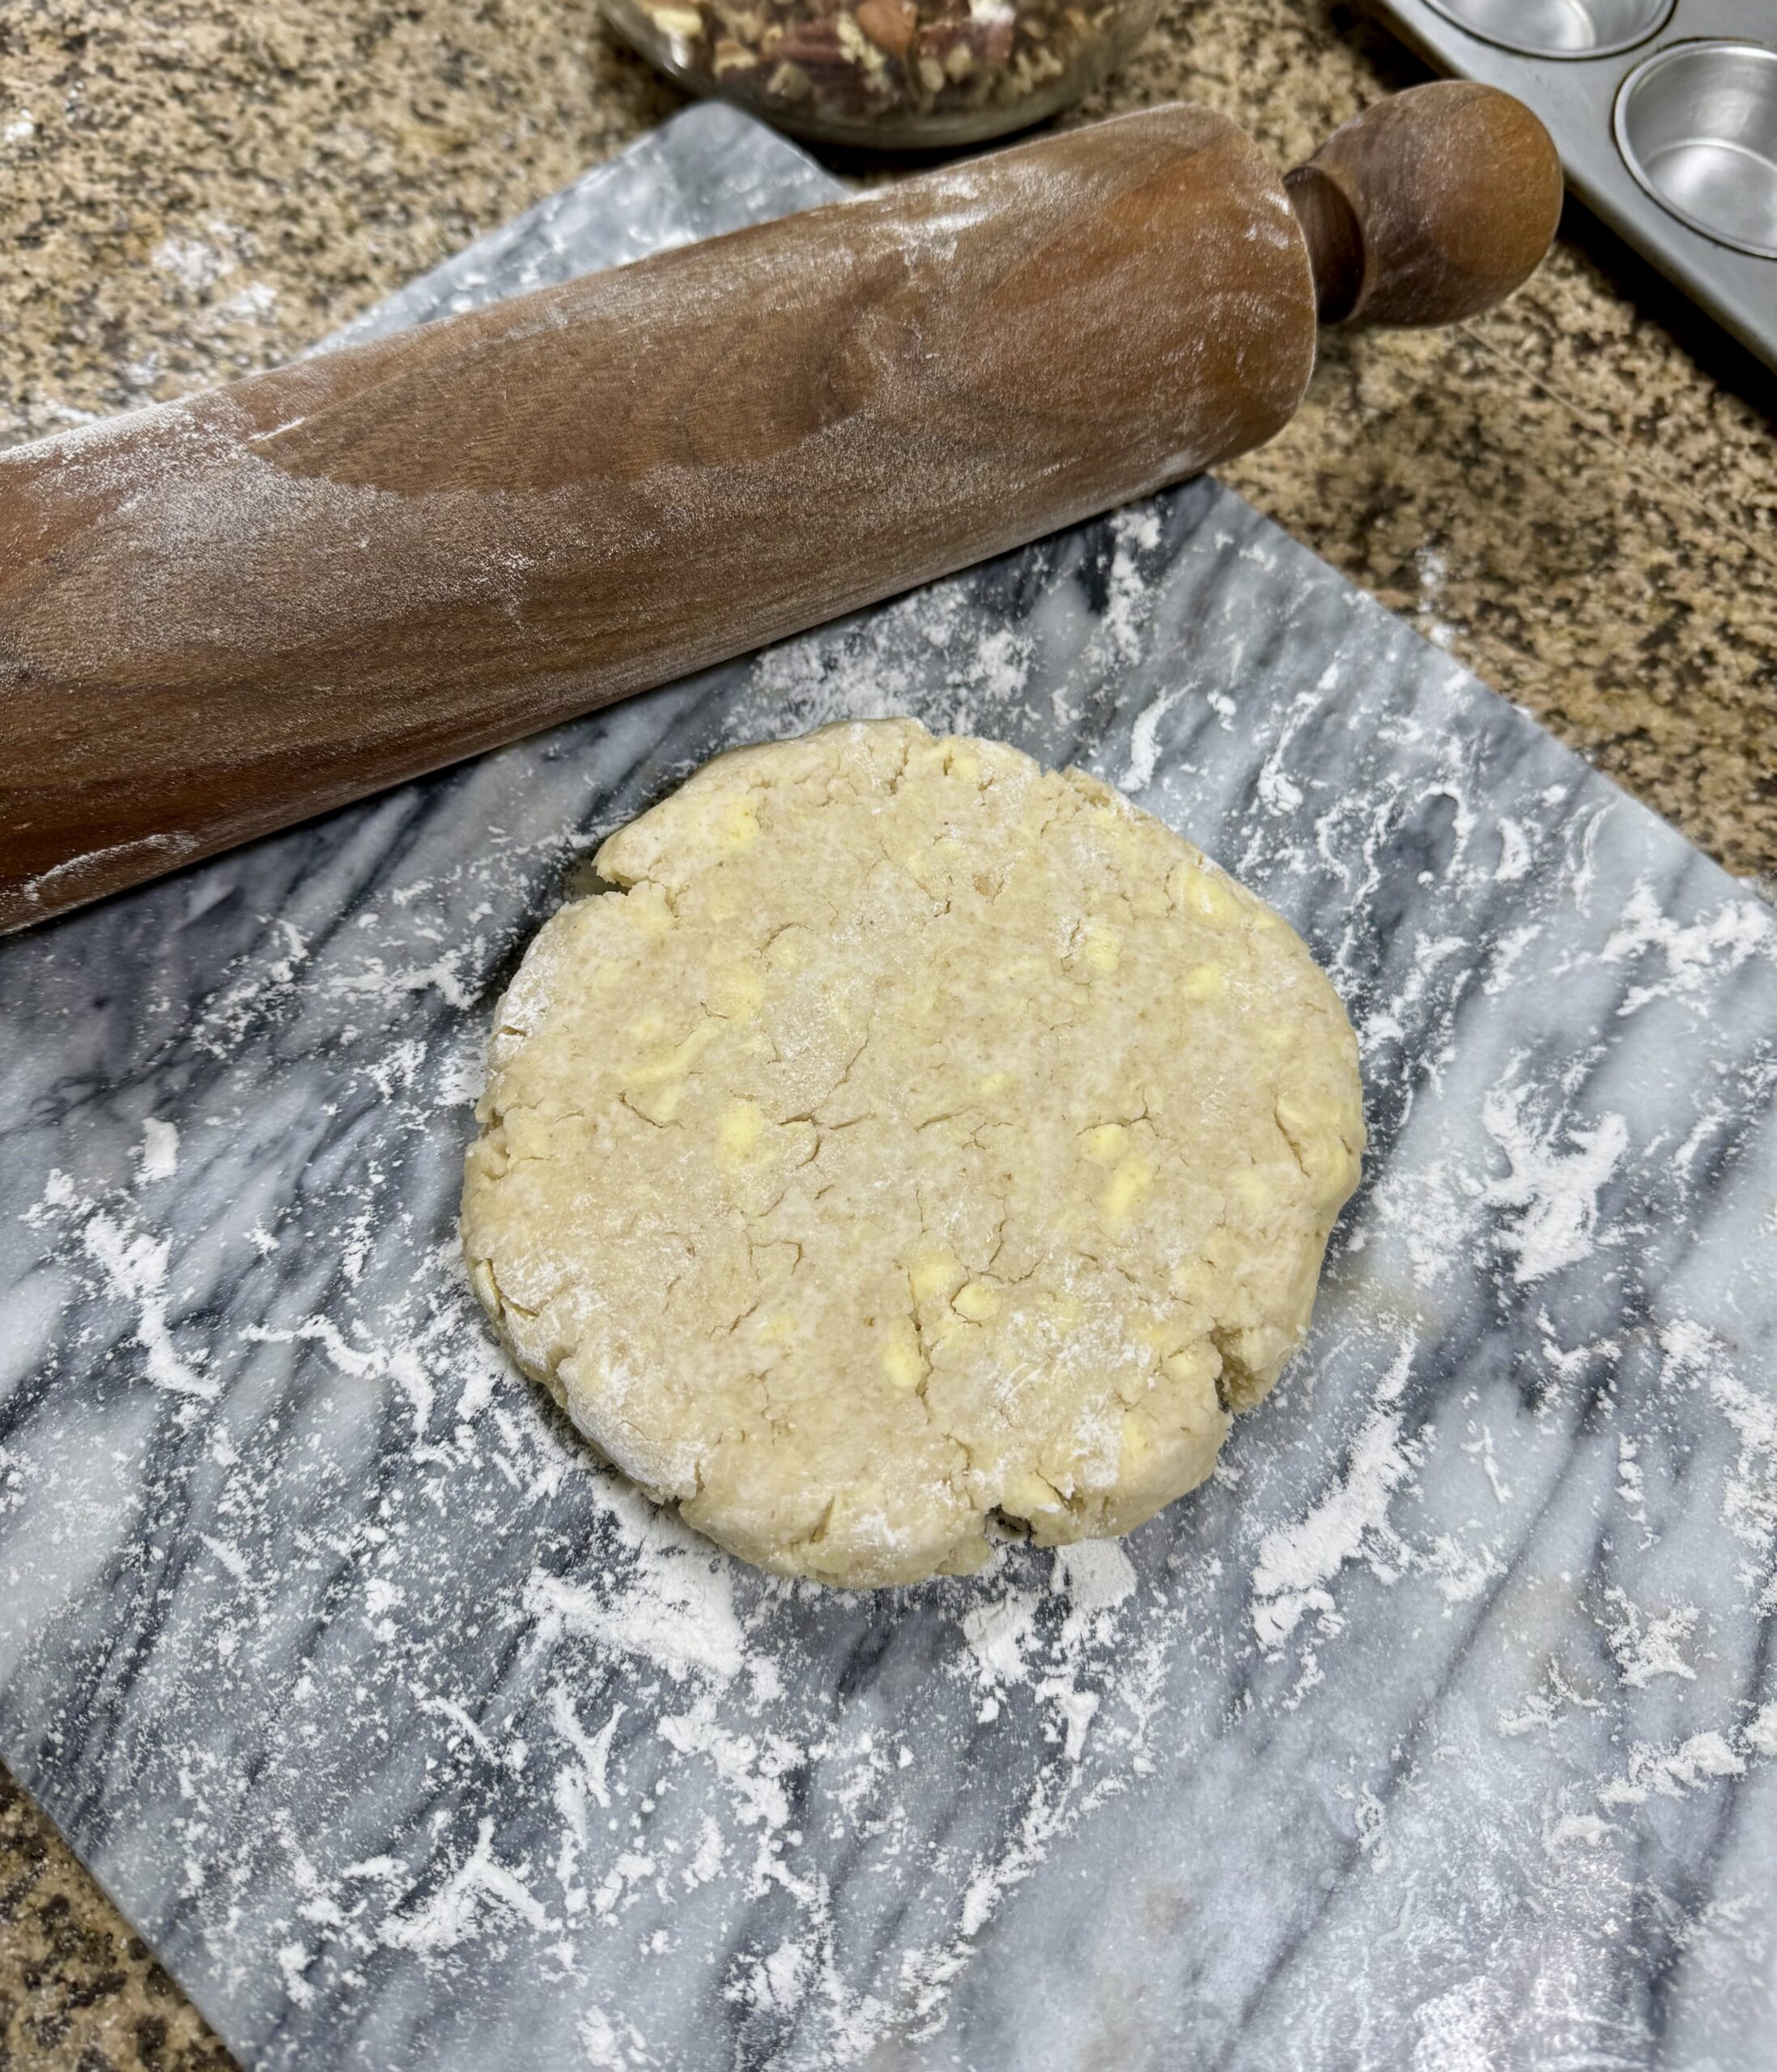
Add the water 1 tablespoon at a time, and stir the flour mixture with a fork as you’re adding, to distribute the water as evenly as possible over the dry ingredients. In the humidity of Manila, I only need 3- 3 1/2 tablespoons, but when I’m in Steamboat, I need four, due to the dryness of the air. So just watch your dough, and when it looks like the crumbs are beginning to stick together, it’s done. Don’t add any more water, as tempting as it may be, or your crust may be tough. Gather the dough into a ball while still in the mixing bowl, using the sides of the bowl to help it press together. Then press it into a flat disk and transfer it to a sheet of cling wrap. Wrap it up and chill it for about 20 minutes while you gather the filling ingredients.
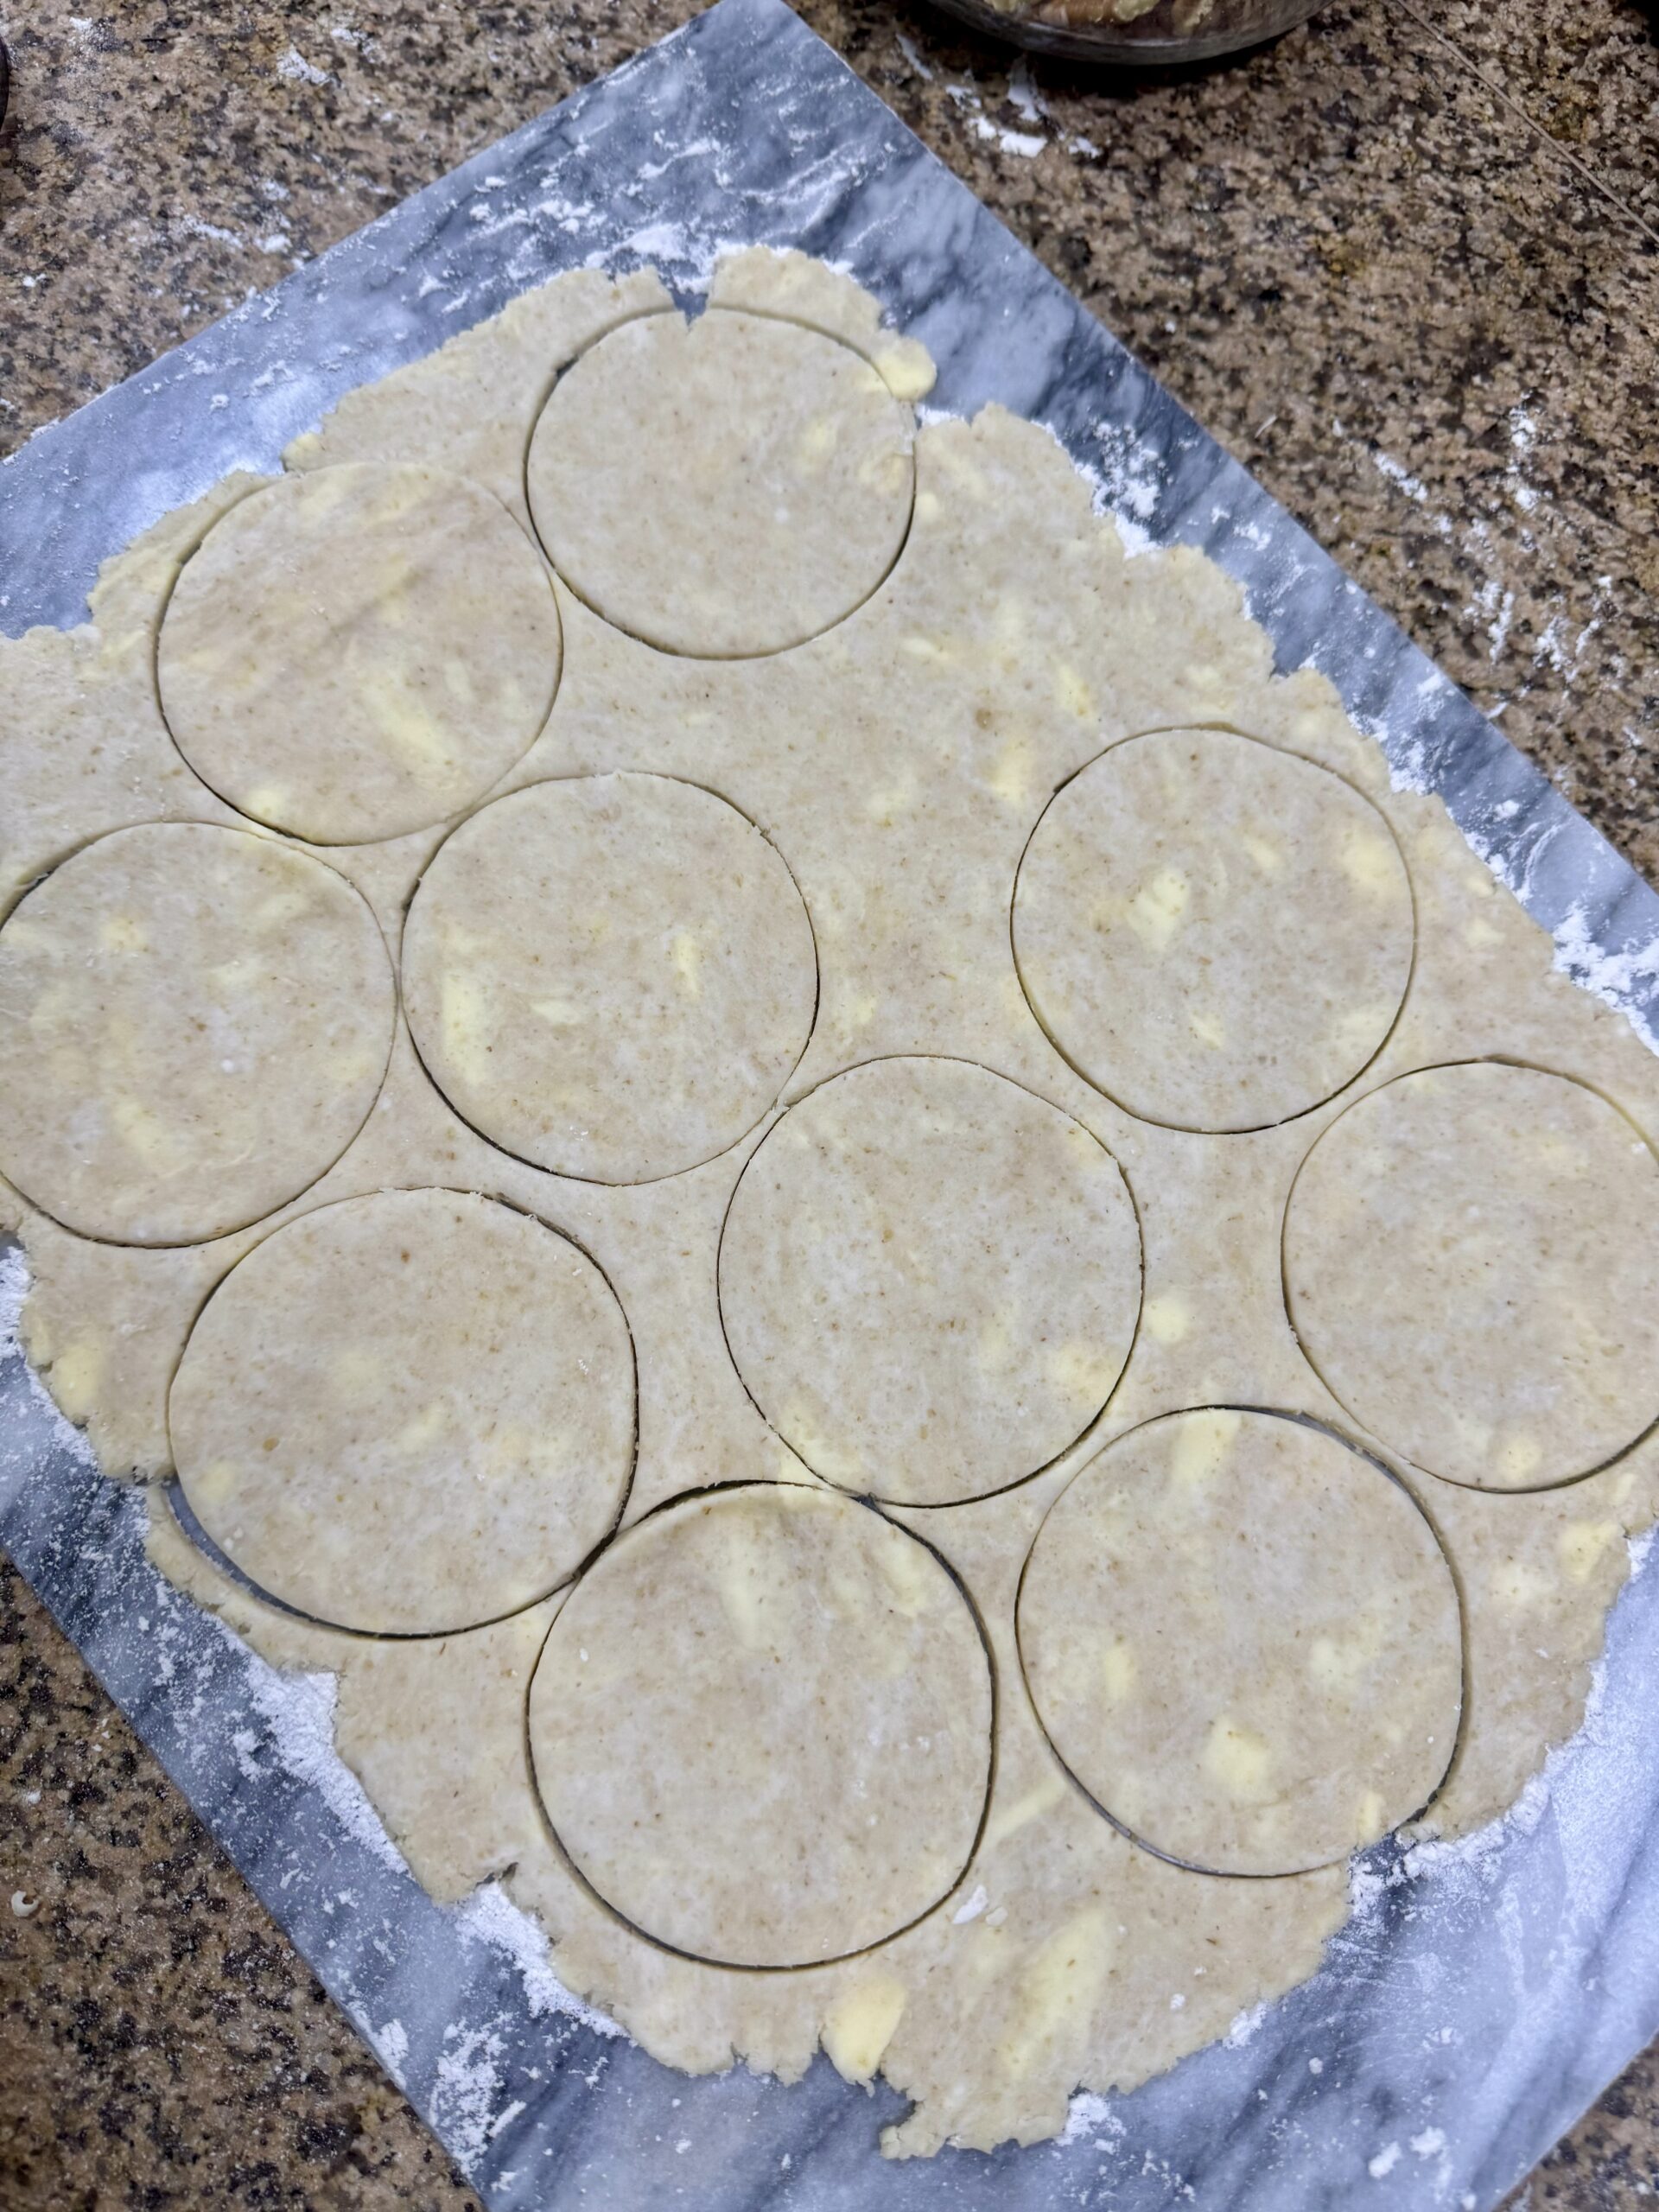
The chilling time not only re-solidifies any melting of the butter and shortening, but also gives the dough a chance to rest and relax, making your baked crust more tender and flaky. When the dough has rested and chilled, roll it out on a floured board. I use a chilled marble block in Manila, but in Steamboat the counters are usually plenty cold already. Roll it evenly to about 1/4-inch thickness, and cut as many rounds as you can in each roll. You want to roll it as few times as possible, because each re-roll will be a bit tougher than the one before. I think I did 3 rolls to cut 16 dough circles.
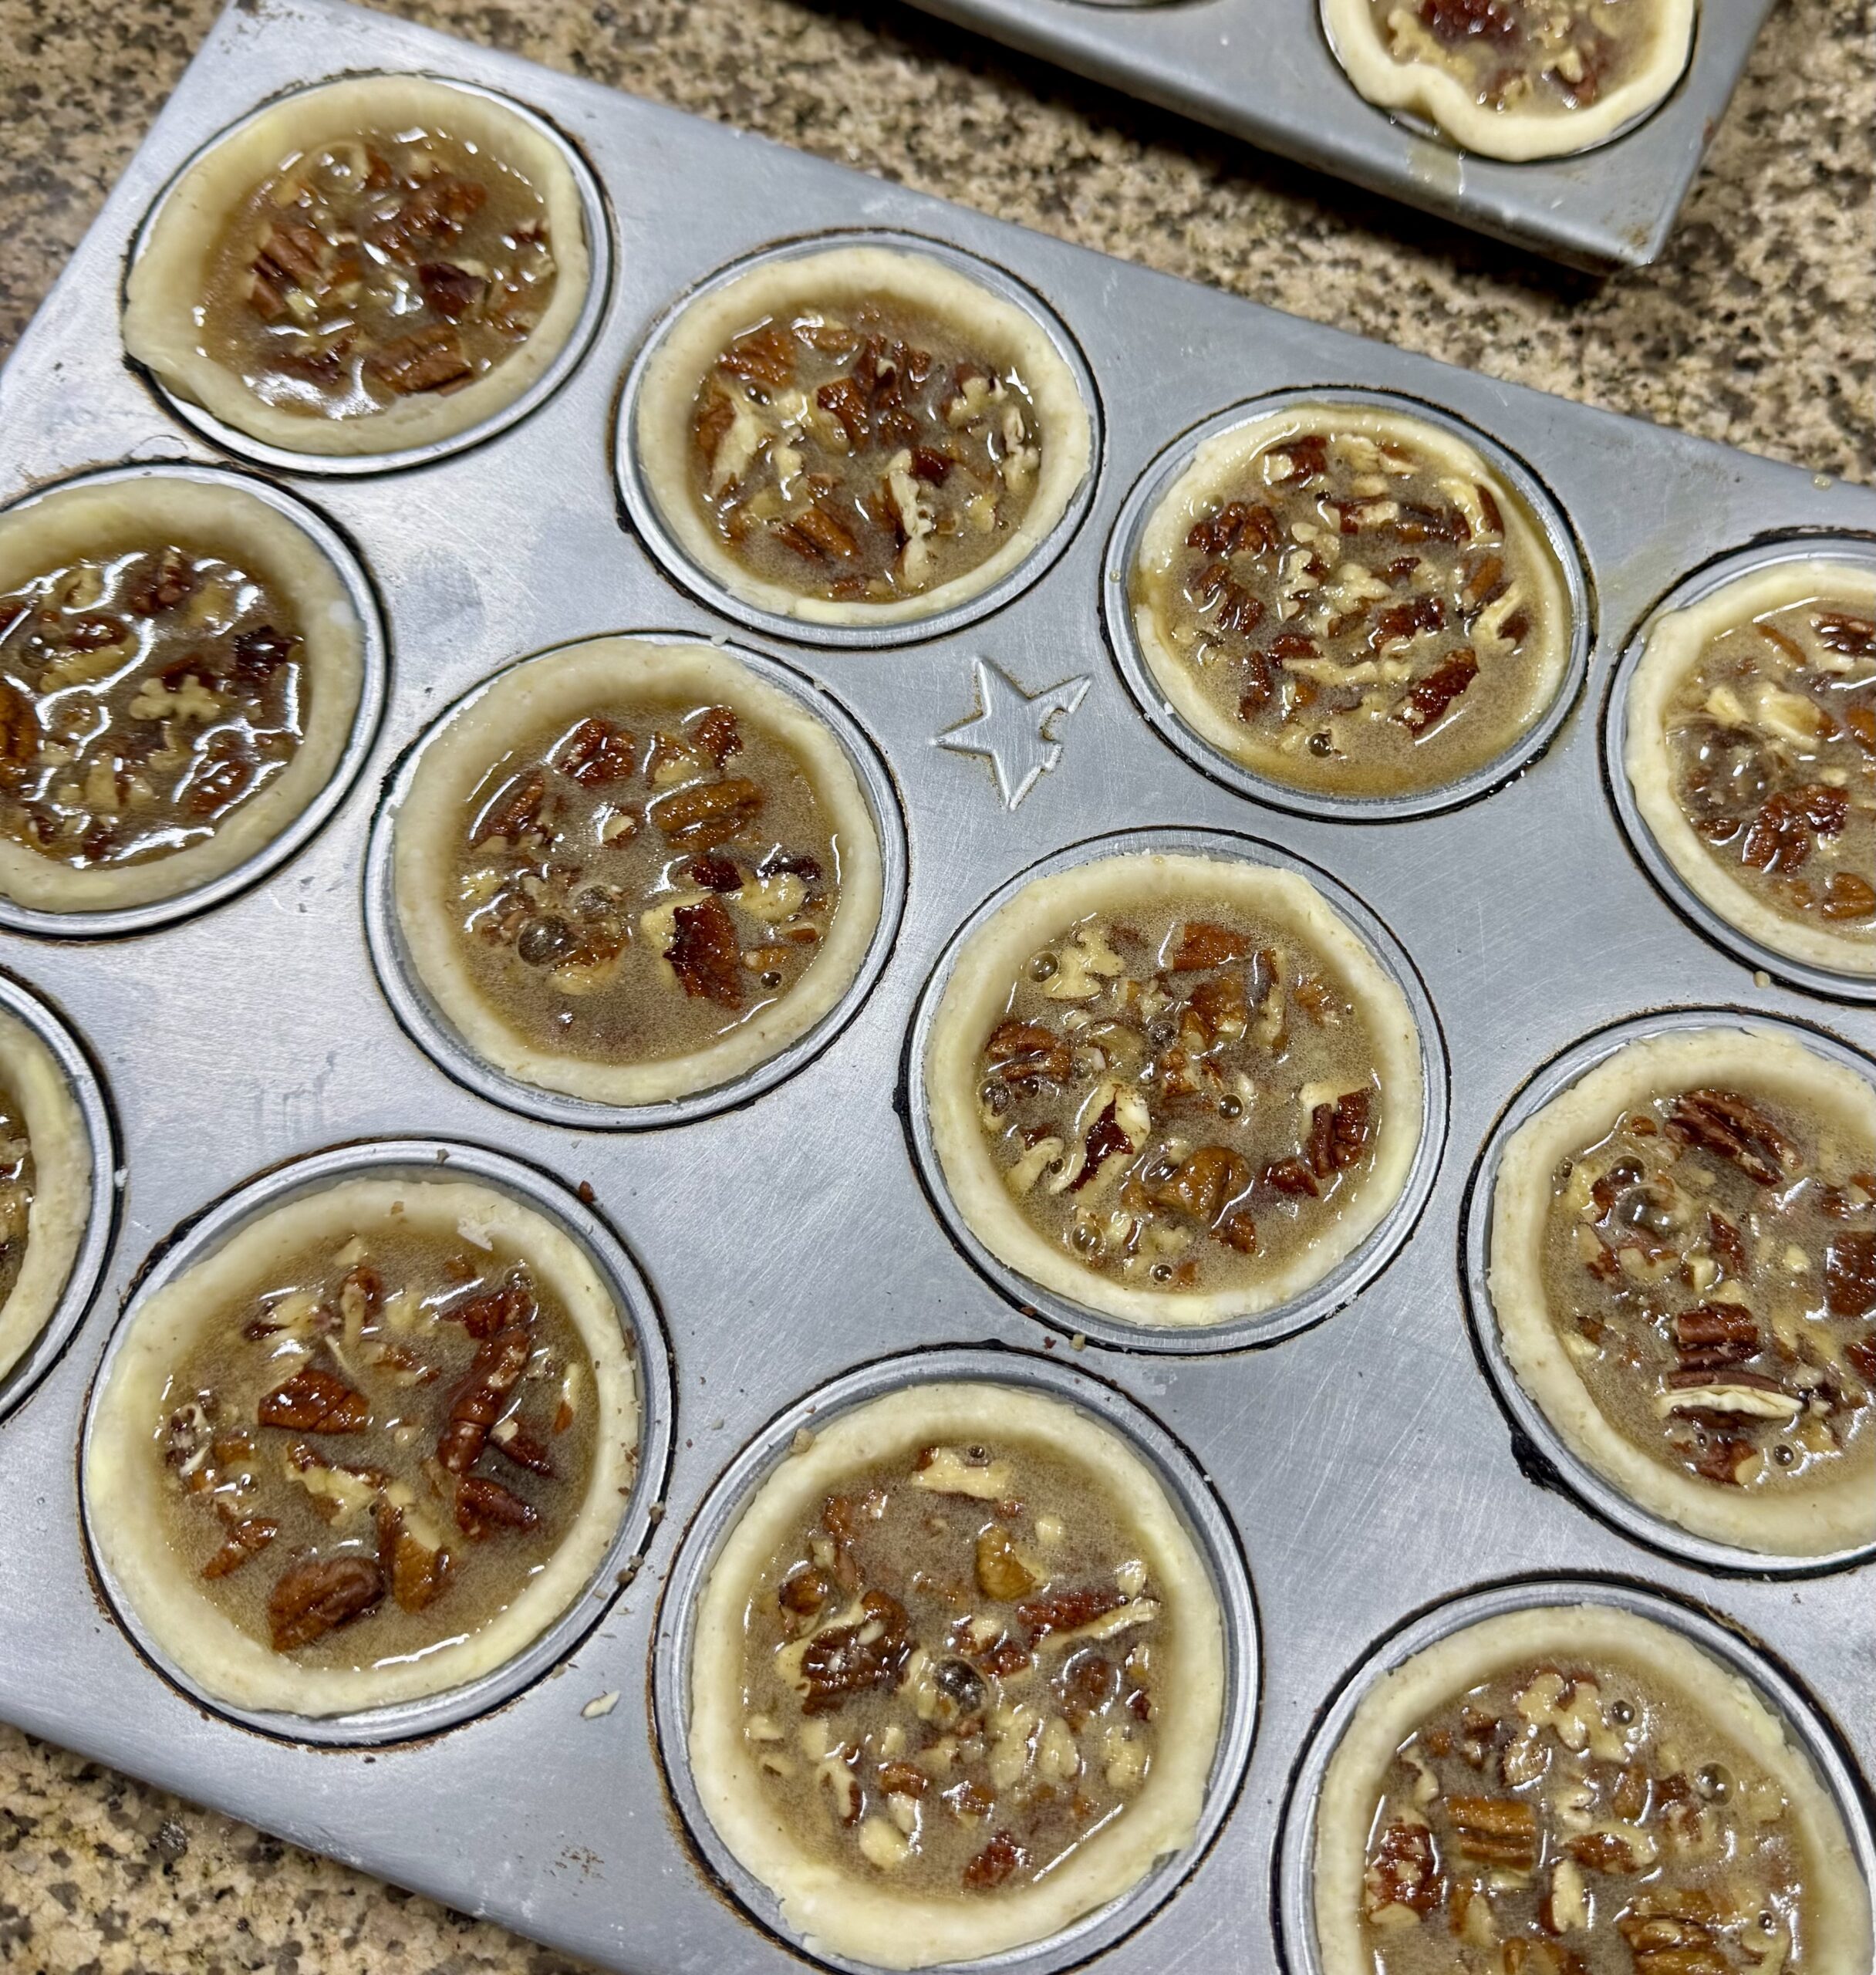
Press the dough circles into the muffin or tartlet tin, gently forming them to the bottom and sides. Now you’ll want to chill it again while you chop up the pecans and mix the filling. Note: keep the pecans separate from the filling, because you’re going to put them in the bottom of the tart shells first, before carefully pouring in the filling mixture. If you mix the pecans into the filling mixture, you’ll have a really hard time pouring the right amount into each shell while still getting a decent amount of pecans in there too, and not overflowing the whole thing. Trust me on this one.
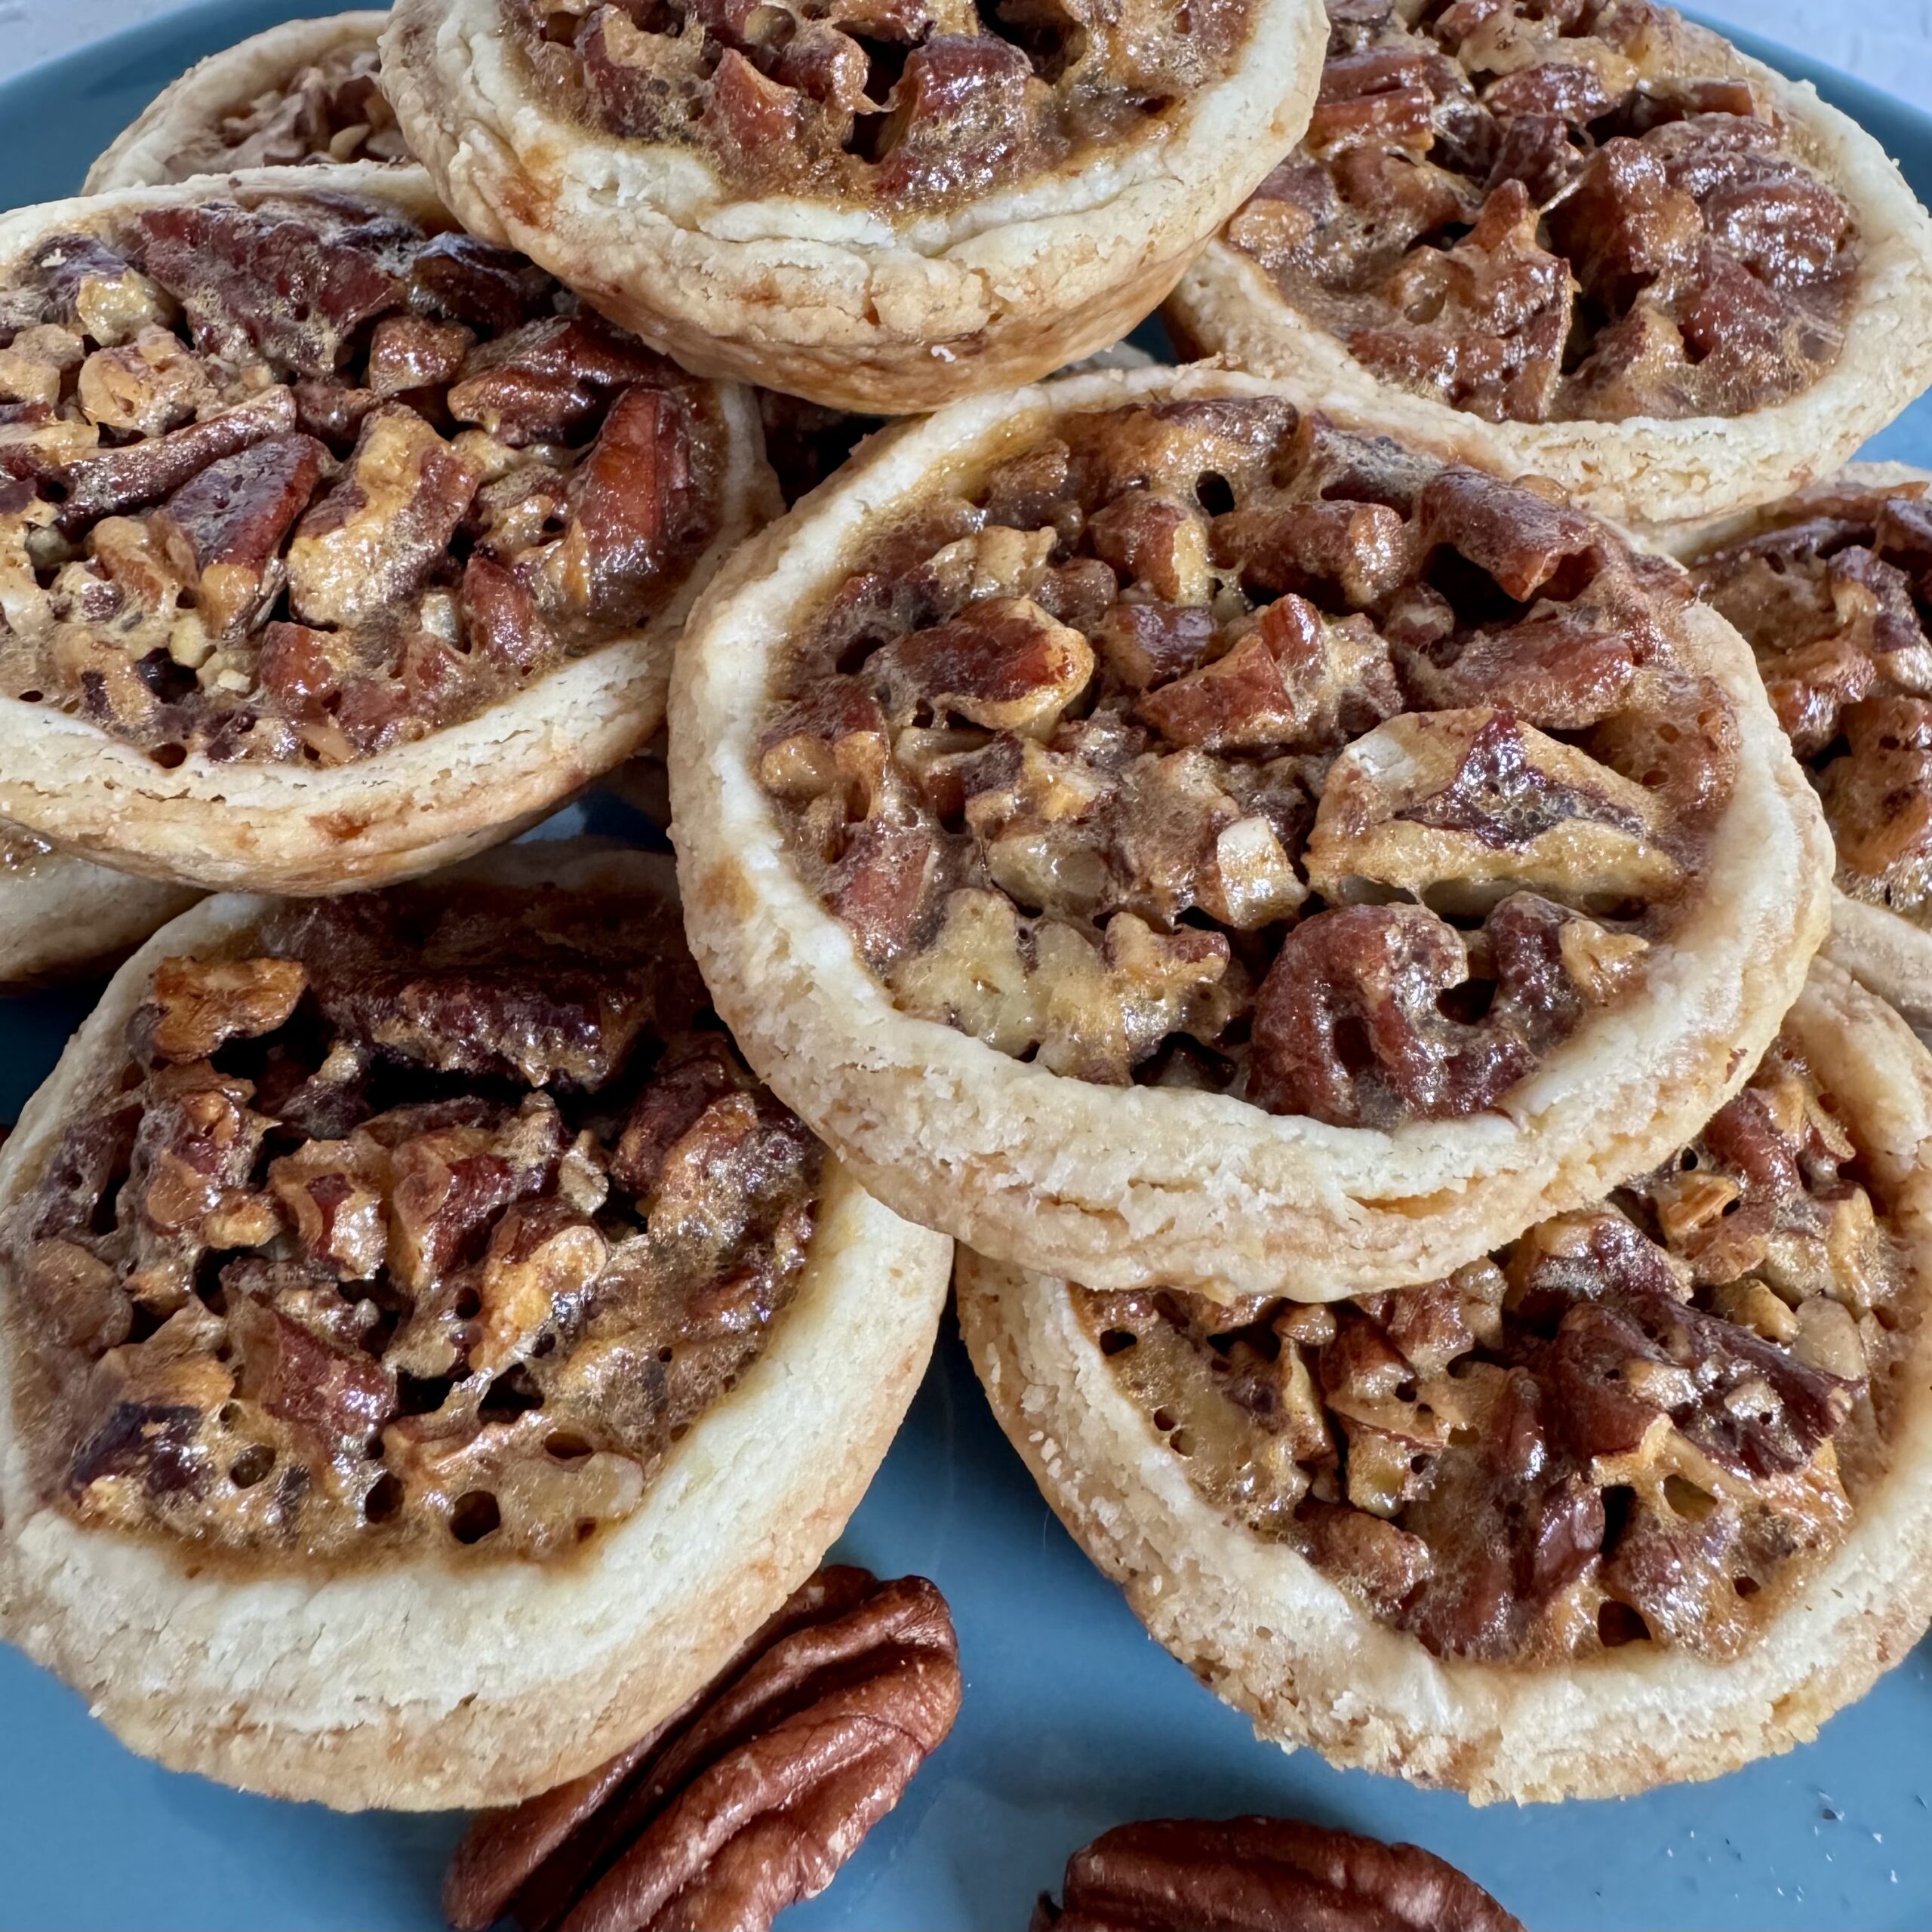
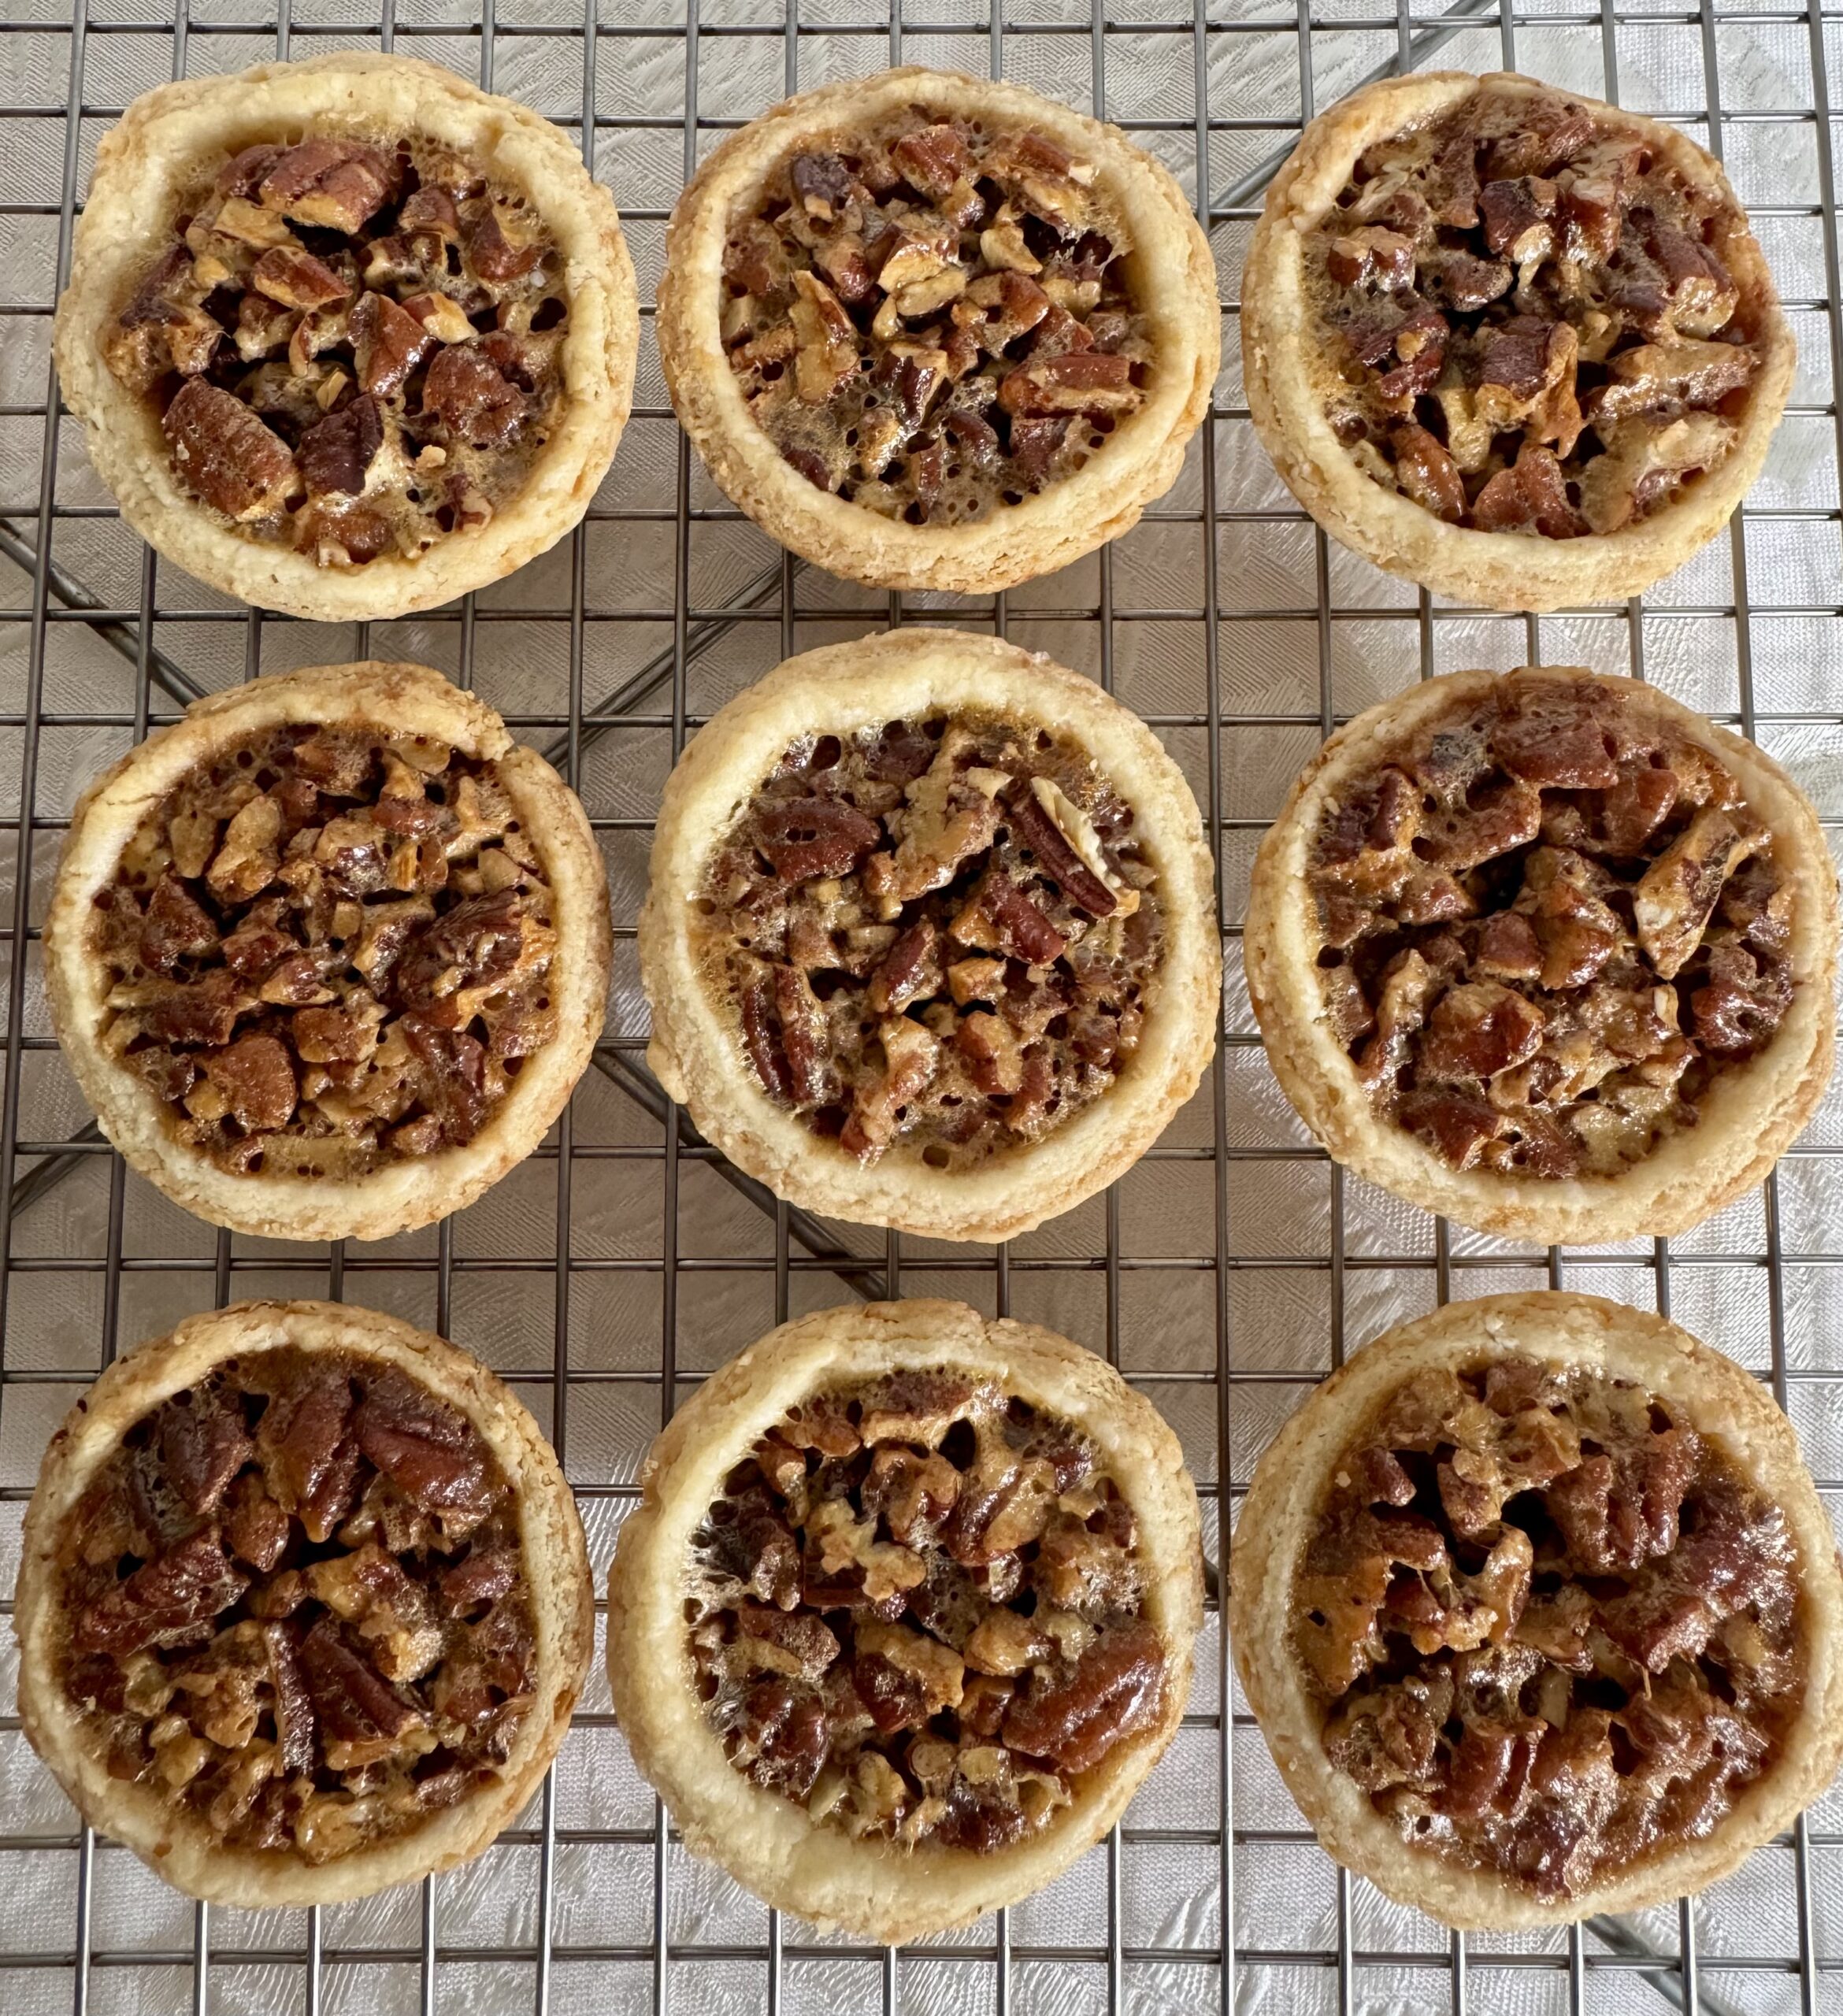
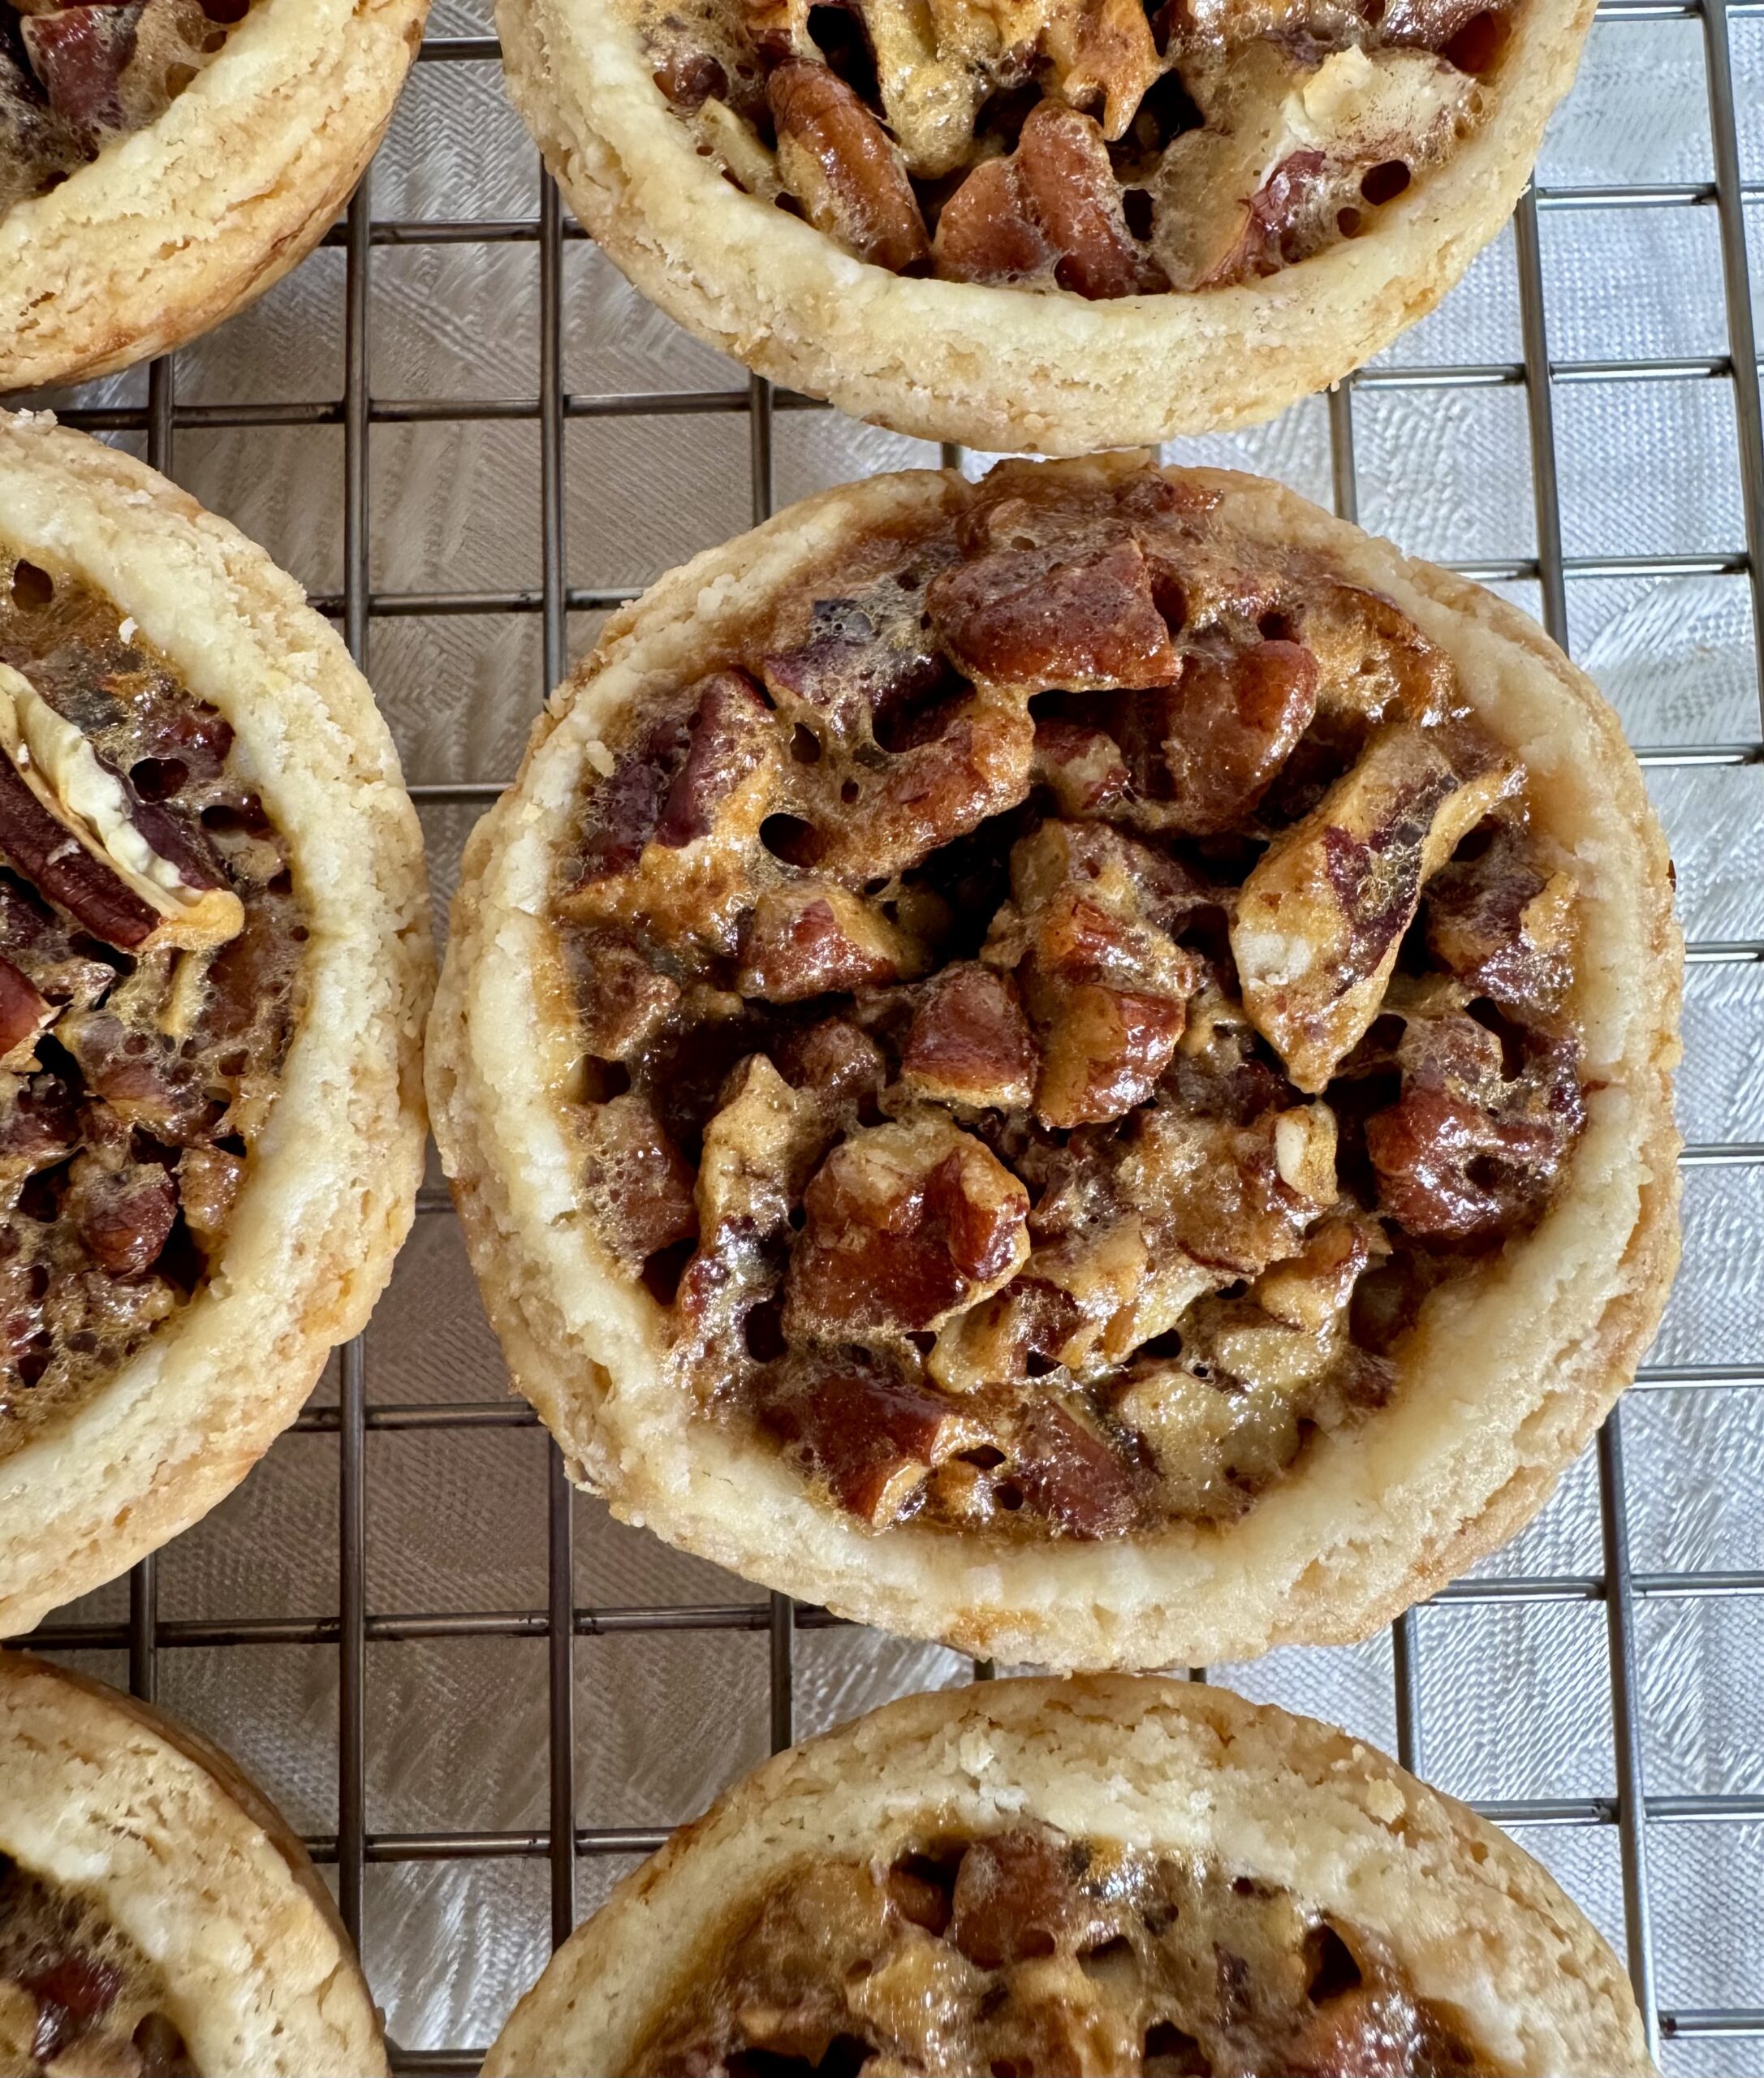
Then you bake! These mini-pies only take about 25-27 minutes, versus 45-50 minutes for a whole pie. They are done when they puff up a bit and reach an internal temperature of 200F (93C). You can’t trust the “wiggle in the middle” test for these because they are just too small. So use your thermometer to ensure that perfect, just-set goo.
You can make them ahead of time if you need to save oven space. Just store them in the fridge for up to 2 days or the freezer for up to 2 weeks for best quality.
Enjoy, friends! And Happy Thanksgiving! I’m thankful for you all.
Mini Pecan Pie Tartlets

Ingredients
- For the crust:
- ¾ cup white flour
- ½ cup oat flour (make by blending oats to a fine flour)
- 1 tsp sugar
- ½ tsp salt
- ¼ cup vegetable shortening
- ¼ cup very cold unsalted butter, cut into cubes
- 3-4 T. ice water
- For the filling:
- 2 large eggs, slightly beaten
- 2/3 cup light corn syrup
- 1/3 cup dark brown sugar
- 1 ½ T. unsalted butter, melted
- ¼ t. salt
- 1 t. vanilla
- 1 cup pecans, coarsely chopped
Instructions
- To make the crust: Whisk together flour, oat flour, sugar, and salt in a large mixing bowl. Cut in the shortening and butter until mixture is mostly coarse crumbs with a few larger pieces. Add ice water 1 tablespoon at a time, mixing with a fork until dough will stick together when pressed between your fingers. Gather dough into a ball and press it into a flat disk. Wrap in cling film and chill for about 20-30 minutes.
- Set aside 1-2 muffin or tartlet tins to accommodate 16 tartlets.
- When dough is chilled, roll out onto a lightly floured board into a large rectangle about ¼ inch thick. Cut into 3- 3 ½ inch rounds with a large cookie cutter or thin glass. Gather up excess pastry and re-roll lightly, cutting more rounds until all the pastry is used. Press rounds lightly into the tin, cover with cling wrap, and chill again for 20-30 minutes.
- Preheat the oven to 350F (180C).
- To make the filling: In a medium bowl whisk together the eggs, corn syrup, brown sugar, melted butter, salt, & vanilla until smooth.
- Spoon 1 T. chopped pecans in the bottom of each tartlet shell, and then carefully pour in the filling mixture, being careful not to let it spill over the sides.
- Bake 25-27 min until the crust is browned and filling is puffed up and reaches an internal temperature of 200F (93C). Remove from oven. Let cool for about 10 minutes, then remove from tins.
- Cool completely before serving. Makes about 16.
OMG. My registered dietitian is telling me, ‘when you think you’re just too full to eat another bite … you’re not.’ That’s been my philosophy for over 50 years!
I can personally attest to the deliciousness of these pie tartlets. All 50 of them. Yum!!!!